|
Crunch Week - This is our final week to finish this year's yearbook. A number of photo sessions are scheduled. We have tracked those areas that we need to work on this week and they are listed on the class' white board. Try to keep this board up-to-date with anything that you feel could use improvement. We're trying to create the best book ever done at PIckering and we need everyone thinking and analyzing how we can improve over past issues.
Theory This Week - One area that we are going to be stressing this week is the concept of creating page layouts that will print and transfer well. This means using Preflight Profiles in InDesign. Download this preflight document and we'll be discussing how this profile can help us avoid pitfalls in getting our book to the publisher and saving time and money by avoiding mistakes. Our Workflow - for creating pages must be consistent and mirrors what is done in industry. Here are the basic steps:
We have a busy couple of weeks coming up. We have started putting together designs for this year's yearbook in order to make this important deadline. A number of photo shoots need to occur this week. This Tuesday afternoon our seniors will be taking the hands-on part of the NOCTI exams. We all will be doing some practice exercises to make sure we're comfortable with tasks that may appear in the exam. These tasks include:
Please let me know if you have any issues getting to the following yearbook tools:
We'll be using this reference to complete the creation of our yearbook. Please download this first thing on Monday. It will help you understand how designing for print production differs from how we would design for digital web or electronic documents. I'm beginning the week at a conference in Hershey. I presented a session on QR Codes this morning and on Monday I'll be presenting with Ms. Kleinfelter and Mrs. Moylan. As a result, I will not be in class on Monday. I'm going to let you choose your project today - but I expect all of you to post a finished work by the end of class.
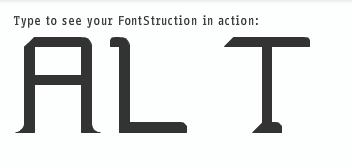
Here are your choices for today: Create Your Own Font: One of the presenters I worked with this morning (Christine DiPaulo) shared this terrific website that allows you to create your own font. The site is called Fonstruct. What I'd like you to do before the end of class is this:
Create two mousepad designs: If you won a mousepad kit in the past week or two, create the design for your mousepad. The design can be created in either Adobe Illustrator or Photoshop. The finished dimension is 9.25 in. x 7.75 in. If you're working in Photoshop, you'll need a resolution between 200 and 300 pixels per inch. Post a screen capture of your finished design. Make sure you save the finished file to your hard drive. If you didn’t win a mousepad, I’ll give a kit to any student that also submits a yearbook cover design today. Create a band, then create a band logo This is a project we did several years ago and I'd like to see what you can do with this design challenge. Google "name my band" and try out a few of the suggested name creators. Decide on a name and then using Adobe Illustrator, create a two or three color logo for your new band. You'll need to create thumbnails for generating ideas and then expand one thumbnail for a full design in Illustrator. If you didn't make a journal entry on Friday - I'll let you make it up on Monday - but it has to show the projects we worked on last week. Don't waste time! |
 Mr. TuckerMr. Tucker is in his 23rd year as the instructor for the Graphic Arts program. Prior to his teaching career he worked in the flexography industry for ten years and in quick printing for ten years. NEED HELP?Weebly Student Log-in Link
PHYS. ED. DAY
AM - Thursdays - 1 PM - Thursdays - 7 HEALTH DAY PM - Mondays - 7 Lake Photo
|
 RSS Feed
