@CCTCHSart
Menu
Picture

Week 13: Projects & Objectives

11/24/2014

0 Comments

 
This week's projects:
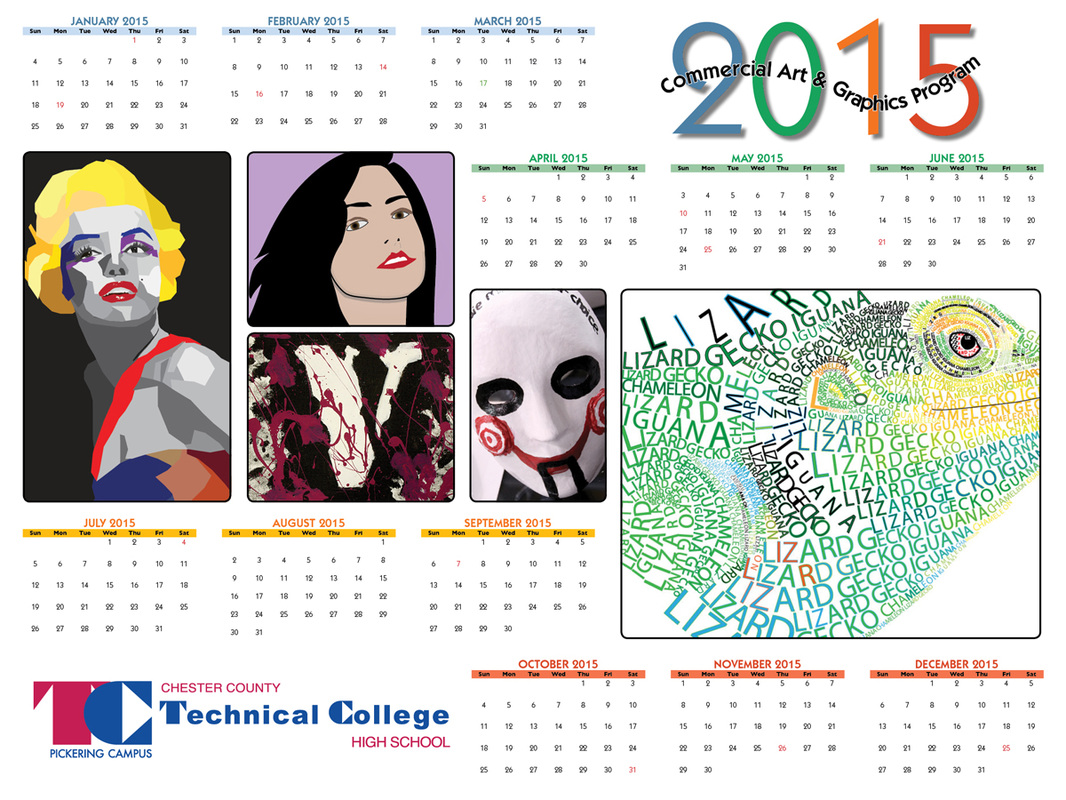
  • Continue working on InDesign Calendar Projects
  • Continue taking make up portraits for missing images
  • Post sample layout of calendar to journal page
  • Compile proof of coloring book for Chester County Dept. of Emergency Services


Media Files for this week:
  • 10 Things you'll want to do in InDesign - Terry White
  • Create a retro Wall Calendar
Calendar Samples:
0 Comments

Week 14: Projects & Objectives

12/2/2013

 
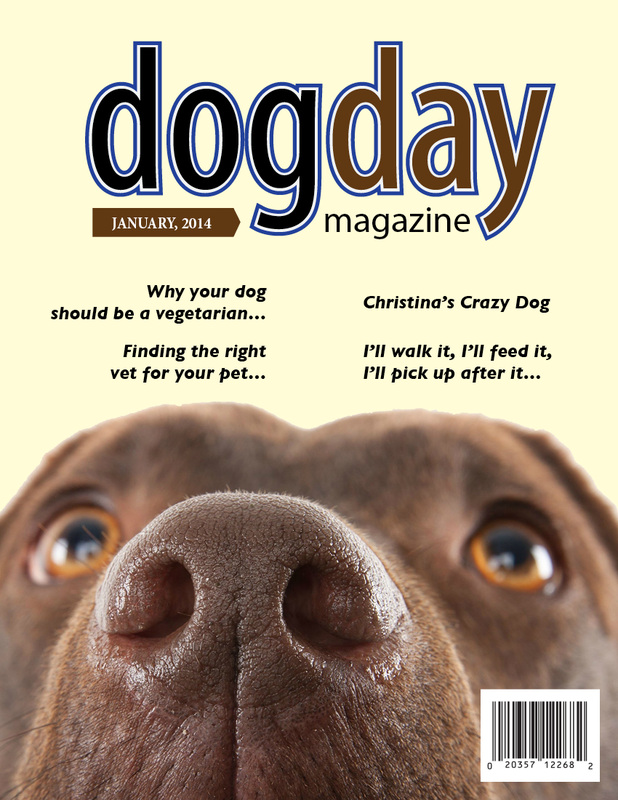
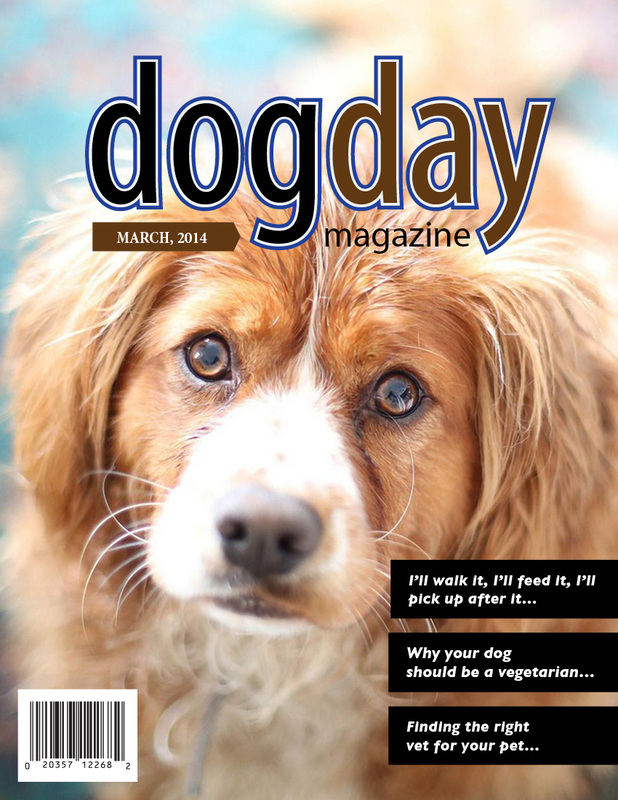
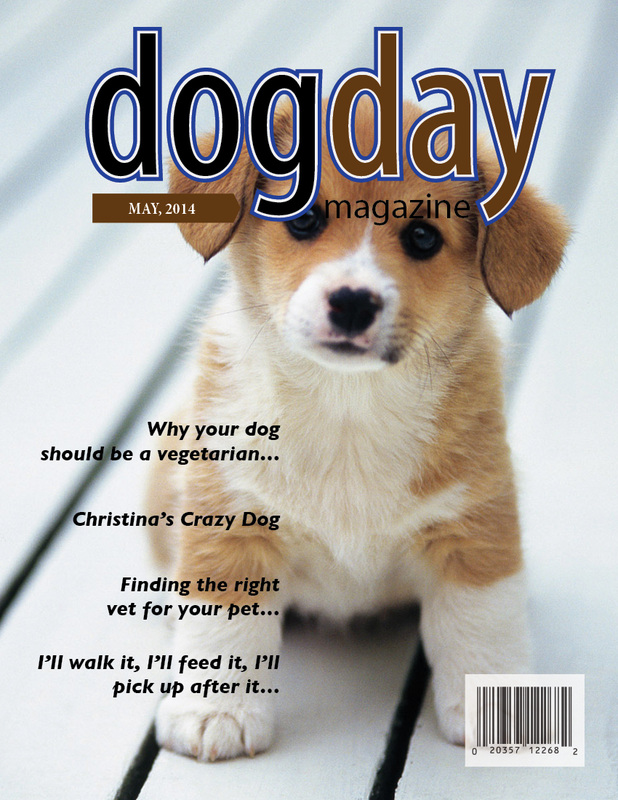
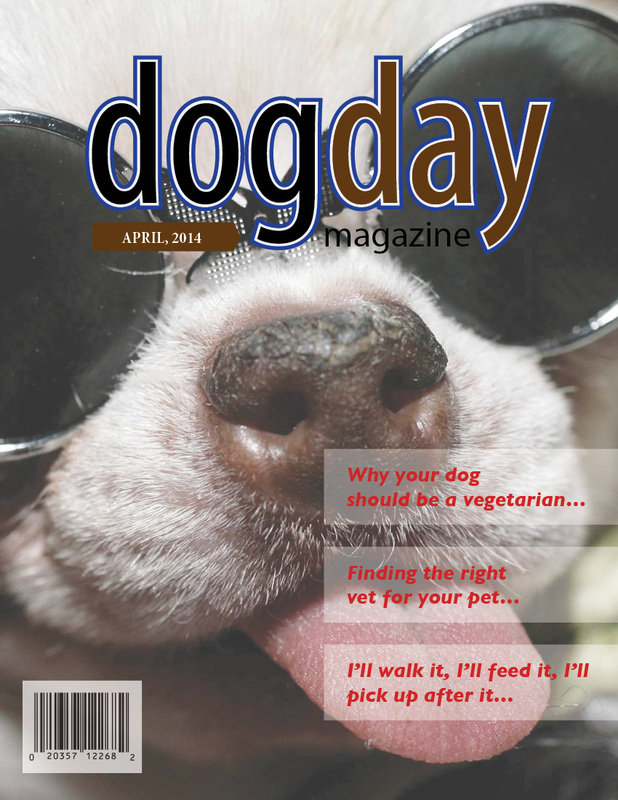
This week we are going to begin working in Adobe InDesign CS6. Our projects for this application include the following:
Magazine Cover - Using the green screen, take a magazine cover photo of yourself or a classmate. We'll be using Photoshop to change the background. Download these mastheads to use for your title. Create the cover by placing teaser text, other images and a background color.
Art Exhibit Poster - Choose a famous artist (daVinci, Michaelangelo, or Caravaggio would work well.) The poster will be tabloid size and advertise a spring exhibit at the Philadelphia Museum of Art. You will need a dozen sample work images for your artist. A research source you could use is the Google Art Project.
Photo Package - we will use this template to create photo packages for our class portraits.

The skills we'll be trying to develop this week include:
  • Designing for bleed
  • Placing Images into frames
  • Scaling, Cropping and positioning images
  • Linking Text frames
  • Exporting as pdf and jpg

Week 1: Welcome to a Great Year!

8/29/2013


Why are we here?

Welcome to the 2013-2014 School year at TCHS Pickering! I'm glad to be back working to help you reach your career goals. I'm looking forward to getting to know our new students and growing the potential of all of our students to do great things. I appreciate your feedback - so although this weekly communication will explain what we do every week in our class in my words, this is your forum as well. If you have ideas or suggestions, feel free to comment on these posts every week. You are the reason we're here and you matter the most!

What's New?

We've added some new technology over the summer: 
  • Two new Canon T4i cameras for basic photography skills, 
  • One T3i with external microphone for video shooting, 
  • a shooting base for product and still-frame animation,
  • two cabled remote shooting devices
  • two different ring lights for portrait & product photography
  • lens covers for all of our kit lenses,
  • a mat cutter for framing finished artwork & photography,
  • scratch art work packs,
  • acrylic paints for mural and other painting projects
In addition to new equipment, we're happy to announce that our school is becoming an Adobe Certified Associate testing center. This will allow you to earn industry certifications in Photoshop, Illustrator, and InDesign. Download and read the files below for a 
 
certification-path-institutions.pdf
File Size: 688 kb
File Type: pdf
Download File

aca_cs6_objectives.pdf
File Size: 1604 kb
File Type: pdf
Download File

If you missed our Back to School Night…

  • You can download a copy of our class syllabus and guidelines here. Please read this and be prepared to discuss. Please return the signed back page to me by September 13th.
  • Both AM & PM classes will normally have Phys. Ed on Thursdays. Make sure you have your PE uniform with you on those days. There are lockers available in our lab if you wish to store your uniform.

Week 29 Projects & Objectives

4/8/2013

 
Yearbook 
Congratulations on putting together a really fine looking chronicle of this school year. Design-wise, this book is well thought out and communicated.  I've had discussions with both the AM and PM classes and based on those discussions, below are some suggestions for next year's work on the book:
  1. Start Earlier: Break the book into sections and teams for completion early in the school year. Every student will have photography, scheduling and design responsibilities that are clear from the beginning of the year. This will happen the second week of September next school year. We'll meet at the end of every month to discuss upcoming events that need coverage.
  2. Know InDesign: This was a major stumbling block. Only five out of fifteen 10th grade students felt comfortable enough working with InDesign to actually finish a page layout. We'll be working the rest of this school year in incorporating InDesign projects into our schedule. The first project we're doing after the yearbook is a mini calendar project and we'll be following the same design process we use for the yearbook. There will be other projects that incorporate InDesign into their completion as well.
  3. Improve your photography skills: All of us can improve our camera skills - this is a never-ending task. We also need to get better at defining what quality images are and editing out bad shots from the beginning. We spent a good portion of time weeding out unusable images. If we do this as photographers at the beginning, we won't have to spend so much time flipping through images when we switch to design mode.
  4. Make Deadlines: Talented designers that can't meet deadlines lose customers. We'll be working on meeting deadlines on all project work. Art as a business is a reality all of you will face if you're going into the commercial art field. Meeting deadlines is a matter of professional pride and if you can't do it, somebody else will. It's that simple.
We still need to finish some yearbook work. The prom, senior awards banquet, the yearbook dedication and graduation all will need photography and multi-media created for the QR Code section of the book. We should also be aware of any other events that we should be covering such as field days, end-of-school events, etc.

Senior Projects
Seniors will be presenting their finished projects on April 30th and May 1st. We'll be finishing up project work in the next week. You should also be working on how you're going to present your portfolio and product over the next two weeks. Make sure that you have fixed your portfolios so that all filler text is either completed or deleted. You can see the judging criteria by downloading this document. Be certain that you hit every judging criteria. You're going to need to practice your presentation and have a clear map for the order of how you'll present your project. It should include a demonstration of a skill. It doesn't have to be complicated - keep it simple so that you could do it blindfolded.
All seniors will be expected to do practice presentations on April 25th and 26th. I'll be sitting down for one-on-one meetings to review your ePortfolios from April 23rd & 24th. Make sure that you're ready to show both your ePortfolio and your class portfolio at that time. Check for any spelling errors that will make you look unprofessional. In our field, spelling counts!

Week 28 Projects and Objectives

3/17/2013

 
Crunch Week - This is our final week to finish this year's yearbook. A number of photo sessions are scheduled. We have tracked those areas that we need to work on this week and they are listed on the class' white board. Try to keep this board up-to-date with anything that you feel could use improvement. We're trying to create the best book ever done at PIckering and we need everyone thinking and analyzing how we can improve over past issues.

Theory This Week  - One area that we are going to be stressing this week is the concept of creating page layouts that will print and transfer well. This means using Preflight Profiles in InDesign. Download this preflight document and we'll be discussing how this profile can help us avoid pitfalls in getting our book to the publisher and saving time and money by avoiding mistakes.

Our Workflow -  for creating pages must be consistent and mirrors what is done in industry. Here are the basic steps:
  1. Copy images from the server to your computer. You can use Bridge to do this so that you're only copying those images that you will definitely use in your layouts. Pick the BEST images you can find. If you can't find them - take them!
  2. Create a separate folder for each page layout you'll be working on. Move all images, logos and graphics into the folder so that all items that go on a page are together in one place. This organization step is critical!
  3. Create a new InDesign Document - 8.5" x 11, .25" margins, .125" bleed, and if you're doing a two-page spread, create three pages in your document. This way we'll be able to see both the left and right side of the pages together.
  4. Create your layout. You can use and adapt the templates that are located on Tucker's Resources to get started. SAVE OFTEN - every five minutes is a good rule of thumb for saving.
  5. Place your original photos into graphic frames by selecting the frame then choosing File>Place
  6. Scale ALL images proportionally - you can set this to occur for all frames on your page by selecting all of them and choosing Object>Fitting>Frame Fitting Options>Fill Frame Proportionally. This will prevent us from stretching images. They don't look good using that method.
  7. The placed pictures are unedited at this point. They are not the correct resolution for printing. They might be light or dark or have a color cast. They are simply linked jpeg files at this point. The next steps are really important to get right.
  8. Determine the actual size of the images by clicking on them with the white arrow selection tool or clicking on the resize circle. Open Transform from the tool menu and mark down the width of the image. Make sure that you're not seeing the width of the frame when you do this.
  9. Control-click on the image and choose>edit with Photoshop. This will launch Photoshop and open the image you just sized in InDesign.
  10. Choose Image>Image Size. This will open a dialog box that you will use to resize the image. Use the width you marked down in InDesign and choose Auto… and select 133 line, best setting. Photoshop will reset the resolution so that it's perfect.
  11. Fix Color cast, lighten the image to bring out darker details if necessary using levels or brightness/contrast layer adjustments. Flatten the image down.
  12. Choose Filter>Sharpen>Smart Sharpen and set the sharpening to 80 with a radius of 1. If you click on the preview you will see a before/after of how details like hair and eyes really come into much better view.
  13. Choose Image>Mode>CMYK Color - this will allow our printer to separate the four process colors.
  14. Choose File>Save as and save as a tiff file.
  15. Return to InDesign and relink your edited photo to replace the jpeg file. Redo these steps for each image on your page making sure that you're getting the correct size for each image!

Week 23: Projects & Objectives

2/10/2013

 
Picture
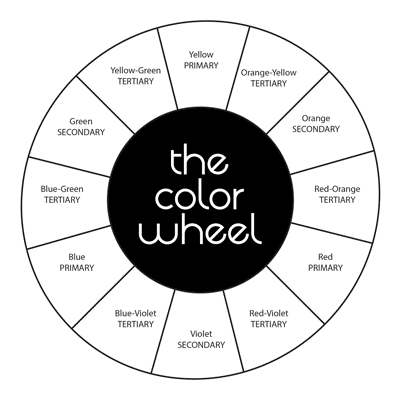
Color Wheel Poster Project
Vocabulary for this project:
  • Primary Colors (yellow, red, blue)
  • Secondary Colors (orange, violet, green)
  • Tertiary Colors (mixes of the primary and secondary colors)
  • Cliché
  • Smart Object
The completed project is an 11 x 17 poster compiled in InDesign but we’ll be creating graphics for the poster in Illustrator and Photoshop as well taking photographs for the finished poster. The following components must be present in the finished design:

Day 1 & 2 (Color Wheel Photos):
  1. Create a new folder called Color Wheel Poster to your desktop. All of your files should be saved into this folder.
  2. Download the Adobe Illustrator file, Color Wheel Grid.ai from the class site.
  3. Open the file in Adobe Illustrator. Understand what is occurring on each of the two layers in Illustrator. We will be dropping in photographs into the grid in Adobe Photoshop using selections and paste into function. The Illustrator file will be functioning as a smart object in Photoshop so that we can continue to edit the file in Illustrator when we need to do so.
  4. Create a new Photoshop file, 11 in. x 11 in., 200 ppi, RGB.
  5. Copy and Paste only the grid from illustrator. Paste as a smart object when asked.
  6. Use either the magic wand tool or quick selection tool to select a color section. Use copy>paste into to paste the needed color image into the grid. Repeat until you’re pleased with the result. It might be a smart to use a theme for this color wheel – organic items v. man-made items. Try to be creative with this component.

Day 3 & 4: Color Acquity Test/Psychology of Color
  • Our annual Who Sees Color Best Competition will be held on these days – we’ll be using this web site for this competition:
  • http://www.xrite.com/custom_page.aspx?PageID=77
  • Post a screen capture of your finished score to your journal. Lowest five scores (AM & PM combined) win a mouse-pad project kit after this poster project is completed.

We’ll need some text for our poster. Pick a single color you wish to feature in your poster. Use the following web sites to read about the psychology of color and how color is perceived differently in different cultures.
http://www.sensationalcolor.com/color-meaning-symbolism-and-psychology
http://www.merttol.com/articles/web/color-psychology-in-creative-design.html
http://www.smashingmagazine.com/2010/01/28/color-theory-for-designers-part-1-the-meaning-of-color/
http://psychology.about.com/od/sensationandperception/a/colorpsych.htm
http://www.infoplease.com/spot/colors1.html
http://www.colour-affects.co.uk/psychological-properties-of-colours

Create a Microsoft Word document (Use this Template) and copy/paste any text you can find related to the color you have chosen. Your text should include both bulleted lists as well as paragraph text. It is a good idea to edit your word file to remove any formatting from the web page. Make sure that you’re copying the sources (web address) of your information as we’ll be giving credit for the text sources.

Day 5: Photography Section
Take seven photos of an object that is of the color you’re going to focus on for your poster. Try to use a low depth of field for these shots and don’t be afraid to fill your composition with the color. In other words, get close to your subject! Upload your images to your Color Wheel Poster folder.

Day 6 & 7: Thumbnails, Rough and layout in InDesign - details to come next week.


Week 14 Projects & Objectives

12/2/2012

 
We ended last week by working with Illustrator's Shape Builder tool and many of you had ah-hah moments as a result. We're going to continue to use this Illustrator tool this week with a new project that we'll be working with in InDesign.

InDesign has undergone quite a few changes because of how publishing has moved towards different medias beyond the printed page. The designed page can now have interactivity, animations and motion never before possible with paper and ink. The advent of digital readers allow us to use motion in our designs. That will be our focus this week. This web page explains some of the new features that allow InDesign to do basic animation work.

The finished project that you will be creating this week will be a choice between an animated cover of your favorite book or a poster design of a favorite movie.
Here are the steps we'll be following for this project:
  • Monday - Brainstorm, Thumbnail  and Storyboard ideas for a simple animation. Hand in your thumbnails and a comprehensive storyboard before the end of class.
  • Tuesday - Using Illustrator, create the graphics necessary for all components of your animation. This will include background, characters and text items. Remember to save each of these as separate Adobe Illustrator files. If you wish to use Photoshop for some of the graphics they need to be transparent or masked.
  • Wednesday - Create a finished InDesign static (non-animated) cover or poster
  • Thursday - Begin to work with InDesign's Digital Publishing tools to create your short animation. Keep this simple for now - you can always expand this after your first attempt.
  • Friday - Export your finished animation and post it to your journal. Fix any problems or issues you might encounter.
If you are caught up on this project finish the calendar project or the join the crowd project. We'll also be taking photos of the staff over the next two weeks. These portraits will be taken on a drop-in basis and the portrait camera will be set up all week for this purpose.

Below is a sample animation of the project for this week
    Picture

    Mr. Tucker

    Mr. Tucker is in his 22nd  year as the instructor for the Graphic Arts program. Prior to his teaching career he worked in the flexography industry for ten years and in quick printing for ten years.


    NEED HELP?

    Picture


    Tweets by @CCTCHSArt

    Follow Al Tucker's board Analog Art Projects on Pinterest.
    Follow Al Tucker's board Photoshop on Pinterest.

    Weebly Student Log-in Link


    PHYS. ED. DAY
    AM - Thursdays - 1
    PM - Thursdays - 7

    HEALTH DAY
    PM - Mondays - 7
    ​Lake

    Photo
    Check-in
    Form


    Categories

    All
    2 Point
    3d
    Abstract Logo
    Aca
    Accordian Book
    Accordion Book
    Adobe Certified Associate
    Advice
    After Effects
    Agamograph
    Airbrushing
    Android
    Animation
    Aperture
    Art Ideas
    Artistic Behaviors
    Artists
    Austin Kleon
    Black & White
    Book
    Bookmarks
    Border
    Braces Removal
    Business Card
    Calendar
    Camera
    Camera Simulator
    Career Research Paper
    Careers
    Cartooning
    Certifications
    Challenge
    Chicago
    Cinemagraph
    Class Notebooks
    Cli
    Collaborate
    Collaboration
    Collage
    College
    Color
    Color Cast
    Color Focus
    Color Wheel
    Comic Book
    Competition
    Competitions
    Contents Schedule
    Contest
    Copyright
    Cover
    Creative Commons
    Creative Modes
    Creativity
    Cte Week
    Design
    Design Competition
    Design Competitions
    Digital Skills
    Diigo
    Docs
    Doodling
    Double Exposure
    Drawing
    Editing
    Education
    Effect
    Email
    Employment
    Eportfolio
    Escher
    Evaluation
    Flickr Storm
    Forum
    Fototime
    Frame
    Framing
    Gaerf
    Gaerf Design Competition
    Google
    Google Docs
    Google+ Hangout
    Grades
    Graduation
    Graffiti
    Graham
    Graphcomm Central
    Graphexpo
    Graphic Arts Education & Research Foundation
    Graphic Novel
    Greeen Screen
    Guidelines
    Harold Barber
    Heisler
    Help
    Ideas
    Illustrator
    Image Correction
    Imovie
    Improvement
    Indesign
    Intro Level
    Ipaper
    Job Shadow
    Journal
    Journals
    Ken Sebra
    Kinetic Art
    Lab
    Learning
    Letter Spacing
    Levelup
    Line Spacing
    Links
    Logo
    Manual
    Mask
    Mat Cutting
    Metering Modes
    Monochrome
    Moods
    Multimedia
    Netvibes
    Networking
    Nocti
    Painting
    Papermaking
    Pathfinder
    Patrick Lamontagne
    Perspective
    Perspective Cropping
    Perspective Drawing
    PETE & C
    Pete & C
    Photo Challenge
    Photography
    Photo Retouching
    Photoshop
    Planets
    Polaroid Collage
    Portraits
    Preflighting
    Printed
    Process
    Product Photography
    Projects
    Psychology
    Publish
    Qr Code
    Qr Codes
    Red Eye
    Reflection
    Remind
    Research
    Retirement
    Rubric
    Rule Of Thirds
    Scanimation
    Scanning
    Scholarship
    Schools
    Screen Capture
    Screen Record
    Searching
    Secret
    Self Portrait
    Self-portrait
    Senior Project
    Shape
    Shield
    Shrine
    Shutter
    Simulator
    Sir Ken Robinson
    Sketchup
    Sketch Up
    Skillsusa
    Skype
    Specifications
    Spellcheck
    Steal Like An Artist
    Storyboard
    Student
    Stumbled Upon
    Success
    Surrealistic Me
    Survey
    Syllabus
    Tables
    Tabs
    Techdirections
    Technical Terms
    Technology
    Tech Term
    Teeth Whitening
    Tessellation
    Text
    Theme
    Thumbnail
    Thumbnails
    Tools
    Topic Form
    Touch Up
    Tracing Project
    Transform
    Travel
    Troubleshooting
    Twitter
    Typography
    Vector
    Video Settings
    Wacom Tablet
    Webquest
    Welcome
    Widgets
    Wisdom
    Work
    Yearbook
    Zentangle

    Archives

    November 2019
    October 2019
    September 2019
    August 2019
    May 2019
    April 2019
    March 2019
    February 2019
    January 2019
    December 2018
    November 2018
    October 2018
    September 2018
    August 2018
    May 2018
    April 2018
    March 2018
    February 2018
    January 2018
    December 2017
    November 2017
    October 2017
    September 2017
    August 2017
    June 2017
    May 2017
    April 2017
    March 2017
    February 2017
    January 2017
    December 2016
    November 2016
    October 2016
    September 2016
    August 2016
    May 2016
    April 2016
    March 2016
    February 2016
    January 2016
    December 2015
    November 2015
    October 2015
    September 2015
    August 2015
    June 2015
    May 2015
    April 2015
    March 2015
    February 2015
    January 2015
    December 2014
    November 2014
    October 2014
    September 2014
    June 2014
    May 2014
    April 2014
    March 2014
    February 2014
    January 2014
    December 2013
    November 2013
    October 2013
    September 2013
    August 2013
    May 2013
    April 2013
    March 2013
    February 2013
    January 2013
    December 2012
    November 2012
    October 2012
    September 2012
    August 2012
    July 2012
    June 2012
    May 2012
    April 2012
    March 2012
    February 2012
    January 2012
    December 2011
    November 2011
    October 2011
    September 2011
    August 2011
    June 2011
    May 2011
    April 2011
    March 2011
    February 2011
    January 2011
    December 2010
    November 2010
    October 2010
    September 2010
    August 2010
    June 2010
    May 2010
    April 2010
    February 2010
    January 2010
    December 2009
    November 2009
    October 2009

    RSS Feed


Make sure you check this site every day for updates
  • Home Page
    • Class Calendar
    • Your Career Portfolio
    • File Sharing Page
    • Class Links
  • Knowledge Base
    • NOCTI Practice Page
    • Art & Computer Lab Safety
    • Careers/Professionalism
    • Copyright & Legal Issues
    • Design Theory >
      • Elements & Principles of Design
      • Color Theory Basics
    • Photography Basics
    • Typography
    • Creative Cloud >
      • Adobe Photoshop
      • Adobe Illustrator
      • Adobe InDesign
  • Student Sample Work
    • Student Files
    • world_quilt
    • Cinemagraphs
    • QR Codes in our program
  • 50.0402 Task List
  • Project Crosswalk