|
Projection Photography This week we are going to begin a new project that will utilize Illustrator and/or Photoshop as well as getting you to work on your photography skills. If you own a camera, you might want to bring it in towards the end of the week. The technical skills you will need in Illustrator include working with the object blends, repeating transformations, and creating patterns. It would be a good idea to study photographer Jake Hicks website tutorial when you're brainstorming ideas. The samples below show basic shapes that were created in Illustrator. You could also interact with another image in your shot and not project onto the body/face. The finished product must include 3 finished portraits retouched. Two need to have only original artwork, the third can use other people's images/logos/artwork. This is due for completion by May 10th. Underclass Students and those not taking NOCTI: CRI Activity #1: Projecting a Budget: To begin the process, go to this website: https://www.pacareerzone.org/budget/county
CRI Activity #2: Entrepreneurship Reflection
We're going to revisit a project that we haven't done for several years. This project will be completed in Adobe Photoshop. You will need to take a portrait photo of your face and we want the image cropped tight to your face. If you have an existing photo that will work. We'll be following the video below to accomplish this project: 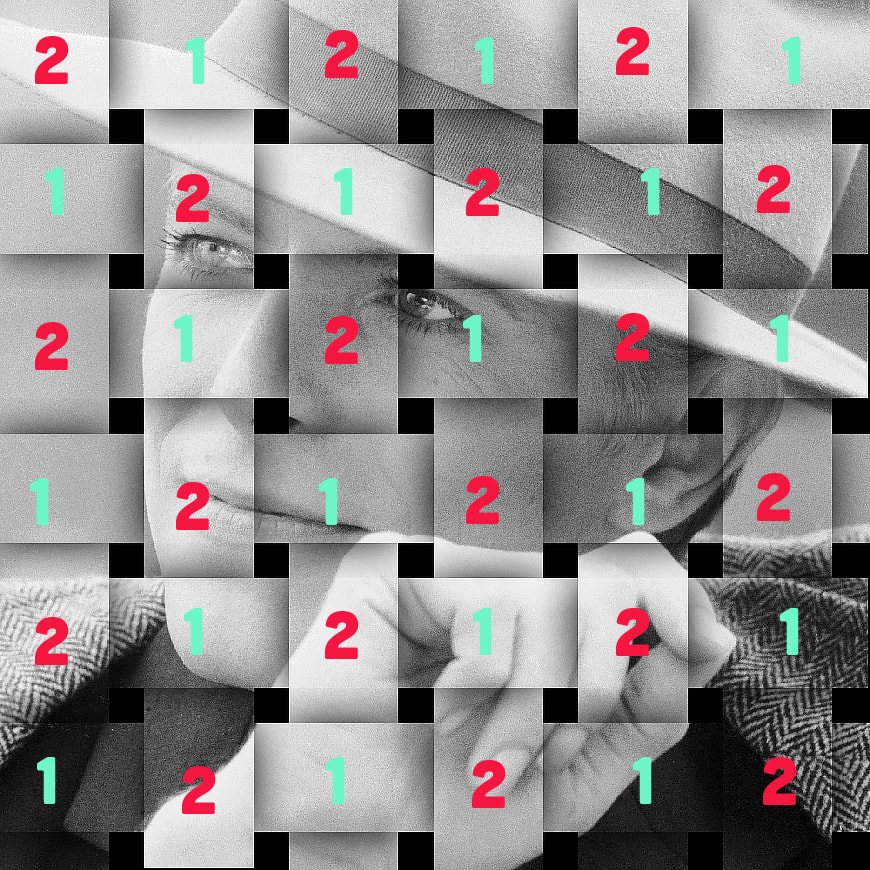 Yearbook Work:
Photographer Presentations: We will start presenting the photographers we've been researching and sharing/critiquing our tribute images this week. Rotoscoping Animation Project
Sam took an interesting way to approach this assignment. She simply painted the shapes and it was able to be done a little quicker. This looks great! Those seniors attending The Career and Training Fair at TCHS Brandywine next Thursday should scout out the companies that align with their interests and career path. Also note, some companies may be hiring for more than one career field - for example - Main Line Health may be hiring for health care professionals and also food service employees. It's important to explore the company, take a look at their website and gather some information.
You can view the list of participating companies here. I"ve highlighted a few that are aligned with visual art careers. Pay attention to when each company is going to be available and schedule your day accordingly. Our goal is for you to interview with at least three companies. If you're looking for a part-time or full-time job this is a great opportunity to possibly land a solid position for the summer, the future, or beyond. Networking is critical to your career. It's a skill you can improve over time and this is a great first step. My Favorite Photographer -
This photo theme project is going to be a little bit different. You can work with a partner on this project if you'd like. Here are the steps for completing this project:
Magazine Cover - Using the portrait studio with lights, take a magazine cover photo of yourself or a classmate. We'll be using Photoshop to change the background. Download these mastheads to use for your title. Create the cover by placing teaser text, other images and a background color. Art Exhibit Poster - Choose a famous artist (daVinci, Michaelangelo, or Caravaggio would work well.) The poster will be tabloid size and advertise a spring exhibit at the Philadelphia Museum of Art. You will need a dozen sample work images for your artist. A research source you could use is the Google Art Project. The skills we'll be trying to develop this week include:
Careers for Creative People Link The next project we work on will be a Career and Professional development project. We will be creating/editing and then creating a brand mark for your Resume package. This is a graduation requirement for our school. We will be using this website to help you develop the copy for each of these components:
For those of you struggling with starting work on your career plan, below are three samples that might help you construct your plan:
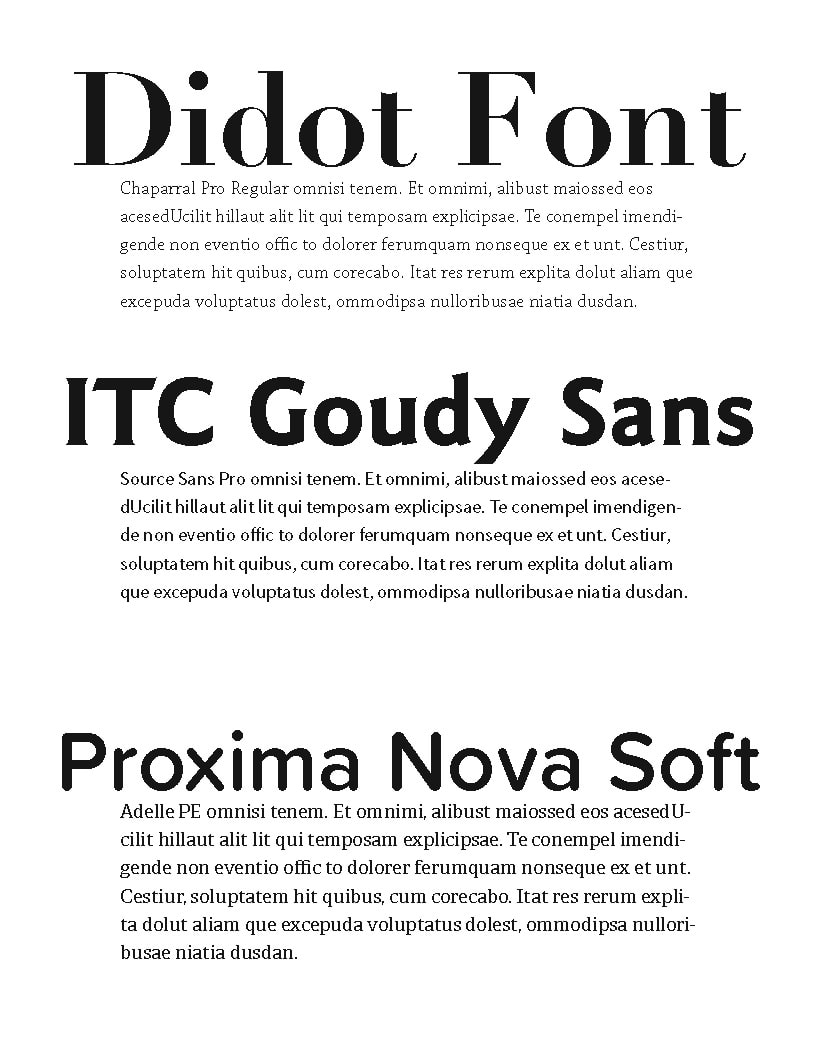
We'll be utilizing Google Docs to edit templates to create the text for your original documents. I would recommend using your student Google drive account for these documents so that you can share them with staff members here for evaluation/input. After these documents are finished we will be modifying them using Adobe InDesign. For this, I am going to ask you to research some font pairings that you think will work for this professional correspondence. The website Just My Type will be helpful with dealing with fonts that are available from Adobe TypeKit. Adobe's TypeKit website could be another great resource to help you make font decisions. Listen to the pros, it will make your life easier and your work look better. I'd like to see you create a type pairing sample sheet like shown below: Competencies We will be Utilizing:
Over the next few weeks we are going to be working on remediating some basic Photoshop, Illustrator and InDesign skills to help our Seniors (and eventually everyone) prepare for the upcoming NOCTI evaluations. Please download the following files that we'll be using in class: Color Cast Photos Practice Files Remove/Straighten Photos NOCTI Study Notes - this document may help you remember the various techniques we've worked with this year. NOCTI Practice Test Files/Specifications Letters with Counters Practice Sheet In addition to this work I am asking you to create a recycled art project. We have a number of supplies that could be used for this and the project gives you lots of room for choice. Pinterest could be a great resource to come up with ideas for a project that you could choose. I discovered a great new way to learn Adobe Illustrator last week with Jason Secrest's website. I've learned some new tricks for working with a Wacom Tablet and Illustrator's pencil tool that I'm sure you're going to like. I recommend that you look over Jason's website and be sure to subscribe to all the resources that he uses in his tutorials. That will make doing these small projects much easier to accomplish. Below is a video that explains how he uses the pencil tool to create wonderful cartoon-like drawings using the pencil tool. In order to access the settings that he's using you will need to double-click on the pencil tool itself in the toolbar. I would recommend watching this video in the YouTube environment - it will allow you to go full screen and see things better. The URL for the project we'll be working with today can be found here. I've attached a simple drawing that you can use to try these techniques out. This is the file he's using of the muffin man. Typography Portraits: Utilizing Photoshop, we will be creating typography portraits like the ones pictured below: Key Concepts to Learn in Photoshop from this project:
Download this file for in-class practice Basics Tutorial for this project - web link |
 Mr. TuckerMr. Tucker is in his 23rd year as the instructor for the Graphic Arts program. Prior to his teaching career he worked in the flexography industry for ten years and in quick printing for ten years. NEED HELP?Weebly Student Log-in Link
PHYS. ED. DAY
AM - Thursdays - 1 PM - Thursdays - 7 HEALTH DAY PM - Mondays - 7 Lake Photo
|

 RSS Feed